
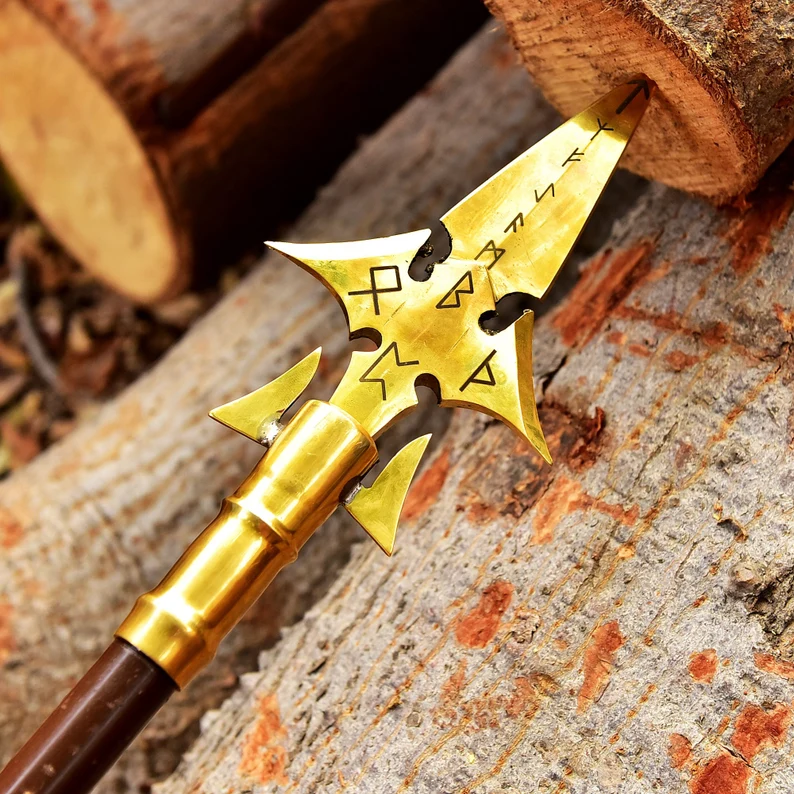
Viking Spear Making — History, Techniques & Craftsmanship Explained
Every Viking spear that flew across a battlefield, drove through a shield wall, or was hurled skyward in offering to Odin began the same way — in fire, on an anvil, in the hands of a skilled craftsman.
The Viking spearsmith was not simply a metalworker. He was a specialist who understood metallurgy, geometry, heat, and the physics of combat. The spears he produced were not crude iron points lashed to sticks. They were precision instruments — engineered for balance, durability, and lethal efficiency — built using techniques that modern blacksmiths still study and replicate today.
This is the complete history and craft of Viking spear making — from raw ore in the ground to finished weapon in a warrior’s hand.
Part One — The Raw Materials
Iron Ore in the Norse World
The Viking Age spear began not in a smithy but in a bog.
Scandinavia lacked the rich iron ore deposits found further south in Europe. What the Norse world had in abundance was bog iron — iron ore that formed naturally in wetlands and marshes through a slow biological and chemical process over centuries. Bog iron was harvested by hand from shallow bogs, dried, and then smelted into usable metal.
It was not the highest quality iron available in the medieval world. It was relatively impure, inconsistent, and required skilled handling to produce good results. But it was available — and Norse smiths became extraordinarily skilled at working with what they had, developing techniques to compensate for the limitations of their raw material.
Charcoal — The Fuel of the Forge
Viking Age smelting and smithing ran entirely on charcoal — not coal. Charcoal burns hotter and cleaner than raw wood, reaching the temperatures necessary to smelt iron and work steel. Producing charcoal required large quantities of hardwood, carefully stacked and slow-burned in covered pits to drive off water and volatile compounds.
The charcoal supply chain was as critical to Viking weapon production as the iron supply. A smithy without charcoal was a smithy that could not work.
Ash Wood — The Sacred Shaft Material
While the spearhead was iron and steel, the shaft was universally ash wood — and this was no accident.
Ash (Fraxinus excelsior) possesses a near-ideal combination of properties for a spear shaft:
- Strength — High tensile and compressive strength resists the impact of combat
- Flexibility — A degree of flex absorbs shock rather than transmitting it to the wielder’s hands
- Straight grain — Ash grows with exceptionally straight grain, making it easy to produce true, balanced shafts
- Availability — Ash grew abundantly across Scandinavia and the British Isles
The Norse connection to ash ran deeper than practicality. In Norse cosmology, Yggdrasil — the great World Tree connecting all nine realms — was an ash. The first man, Ask, was created from an ash tree by Odin, Vili, and Vé. The ash shaft of a Viking spear was not merely functional — it carried cosmic significance.
Part Two — The Smelting Process
The Bloomery Furnace
Viking Age iron production used a bloomery furnace — a relatively simple clay or stone structure, typically 3–4 feet tall, with an air inlet at the base for bellows.
The process worked as follows:
1. Charging the furnace Alternating layers of charcoal and dried bog iron ore were packed into the furnace from the top.
2. Firing The furnace was lit and bellows — operated by hand or foot — forced air through the tuyère (air inlet) at the base, driving temperatures high enough to begin reducing the iron ore.
3. Reduction At around 1,200°C, the carbon in the charcoal reacted with the oxygen in the iron ore, producing carbon dioxide and leaving behind metallic iron. Crucially, this temperature was below the melting point of iron — the metal did not liquefy but instead formed a spongy, porous mass called a bloom.
4. Extracting the bloom After several hours of smelting, the furnace was broken open and the bloom — a rough, slag-contaminated mass of iron — was extracted while still hot.
5. Consolidation The bloom was immediately hammered on an anvil to drive out slag and consolidate the iron into a workable mass. This process — called shingling — had to be done quickly while the metal remained hot enough to be worked.
The result was wrought iron — low in carbon, tough, and relatively soft. Useful as a starting material, but not yet the high-performance metal a quality spearhead required.
Part Three — Steel Making & Pattern Welding
The Carbon Problem
Pure wrought iron is tough but too soft to hold a sharp edge. To make a blade that cuts, you need steel — iron with a controlled carbon content, typically between 0.3% and 1.2%.
Viking smiths understood this empirically long before anyone understood the chemistry behind it. They knew that iron worked repeatedly in a charcoal fire gradually became harder — what was actually happening was carburisation, carbon atoms from the charcoal migrating into the surface layers of the iron during heating.
By carefully controlling heating time, temperature, and atmosphere, skilled Viking smiths could produce steel of varying carbon content — hard steel for cutting edges, softer iron for toughness and flexibility in the body of the blade.
Pattern Welding — The Pinnacle of Norse Smithing
The most sophisticated technique in the Viking spear maker’s arsenal was pattern welding — a process of forge-welding together multiple bars of iron and steel with different carbon contents, then twisting, folding, and manipulating the resulting composite bar to create complex internal structures.
The process for a pattern-welded spearhead worked roughly as follows:
Step 1 — Preparing the bars The smith prepared multiple bars of iron and steel — typically alternating high-carbon and low-carbon material. These might be 4, 8, or even 16 individual pieces, depending on the complexity of the intended pattern.
Step 2 — Forge welding The bars were heated to welding temperature — around 1,300°C, when the metal becomes almost liquid at the surface — and hammered together on the anvil. This required extraordinary skill and speed. Too cool and the weld would not take; too hot and the metal would burn and become unusable.
Step 3 — Twisting The welded composite bar was twisted — sometimes tightly, sometimes loosely — creating the characteristic spiral internal structure of pattern-welded steel. Different twist patterns produced different visual effects when the finished blade was etched with acid.
Step 4 — Folding & refinement The twisted bar might be folded back on itself and re-welded multiple times, multiplying the number of layers and refining the internal structure. High-layer-count pattern welds could contain hundreds of individual layers.
Step 5 — Adding the edge For spearheads, the pattern-welded core provided the blade’s body — flexible and tough. A separate piece of high-carbon steel was then welded to the cutting edges, providing hardness where the blade needed to cut.
The result was a spearhead that combined the toughness of wrought iron with the edge-holding ability of steel — in a single blade with a visually stunning surface pattern that emerged when the finished weapon was polished and etched.
Pattern welding was not merely decorative. It was a genuine technological solution to the limitations of Viking Age raw materials — and it produced blades of remarkable performance that modern metallurgical testing confirms were sophisticated engineering achievements.
Part Four — Forging the Spearhead
The Socket — A Critical Innovation
The defining constructional feature of the Viking spearhead is the socket — a hollow cone at the base of the blade into which the shaft fits. This is in contrast to earlier and simpler tanged designs, where a pointed extension of the blade was driven into the shaft.
The socket joint is structurally superior in almost every way:
- Load distribution — Force is distributed around the entire circumference of the shaft rather than concentrated at a single tang point
- Resistance to splitting — The socket reinforces the shaft end, preventing the wood from splitting under impact
- Ease of repair — A broken shaft can be removed and replaced without damaging the spearhead
Forming a socket by hand was technically demanding. The smith had to:
1. Draw out and shape the blade to its final profile 2. Form a flat tang at the base of the blade 3. Carefully fold and weld this tang into a cone shape around a mandrel — a tapered steel rod used to form and size the socket 4. Weld the socket seam closed, ensuring a complete, seamless join
The socket seam on high-quality Viking spearheads is often virtually invisible — evidence of extraordinary welding skill.
Blade Shaping & Geometry
With the socket formed, the smith shaped the blade to its final profile. Viking spear blade geometry varied enormously by type:
Leaf-shaped blades — The classic thrusting spear profile. Widest at the midpoint, tapering evenly to tip and shoulders. Excellent for penetration and withdrawal.
Angular blades — More aggressive geometry with defined shoulders and a relatively parallel-sided blade body. Common in later Viking Age examples.
Broad hewing blades — Wide, heavy profiles with substantial cutting edges. Designed to function as much as cutting weapons as thrusting ones.
Narrow throwing blades — Slim, lightweight profiles optimised for aerodynamics and penetration on impact after being thrown.
Throughout shaping, the smith maintained a central ridge — a raised spine running the length of the blade that dramatically increased rigidity and resistance to bending without adding significant weight. This ridge is visible on virtually every quality Viking spear archaeological find.
Heat Treatment — Hardening & Tempering
A forged blade that has not been heat-treated is not finished. Heat treatment was the process that unlocked the full potential of the steel:
Hardening The completed blade was heated evenly to critical temperature — the point at which the steel becomes non-magnetic, typically around 800°C for high-carbon steel — and then quenched rapidly in water, brine, or oil. This rapid cooling locked the carbon in a hard but brittle crystalline structure called martensite.
Tempering A fully hardened blade is too brittle for combat use — it will snap rather than flex under stress. Tempering corrected this by reheating the hardened blade to a lower temperature (typically 200–300°C) and allowing it to cool slowly. This relieved internal stresses and converted some of the brittle martensite to tougher structures, finding the right balance between hardness and toughness.
Viking smiths had no thermometers. They judged temperature by colour — the colour of the hot metal for hardening, the colour of oxide films forming on the polished surface during tempering. Straw yellow meant one temperature; blue meant another. This colour-reading skill took years to develop and was the mark of a truly accomplished smith.
Part Five — Finishing & Assembly
Polishing & Surface Treatment
After heat treatment, the spearhead was ground and polished — removing scale, refining the blade geometry, and bringing the surface to a functional finish. On pattern-welded blades, polishing was followed by acid etching — typically with organic acids like vinegar or fermented liquids — which dissolved the softer iron layers slightly faster than the harder steel, revealing the twisted, flowing patterns within the blade.
This etching process transformed a functional spearhead into a work of art — the swirling patterns in the steel were not random but deliberately designed by the smith during the pattern-welding process.
Higher-status spearheads received additional decoration: inlaid wire of silver, brass, or bronze hammered into grooves cut in the blade; engraved runic inscriptions on the socket; niello inlay — a black sulphide compound — filling engraved designs to create high-contrast patterns.
Shaft Preparation & Fitting
The ash shaft was carefully selected, seasoned, and shaped. Straight-grained, knot-free ash was split rather than sawn — splitting follows the grain, producing a stronger shaft than sawing across it.
The shaft was tapered at the mounting end to fit precisely inside the spearhead socket. Fit was critical — too loose and the head would wobble and eventually split the shaft; too tight and fitting was impossible without damage.
Once fitted, the head was secured with an iron rivet — a pin driven through holes in the socket wall and the shaft beneath, locking head and shaft together permanently. Some examples also used binding — iron wire or rawhide wrapped tightly around the socket to prevent splitting.
The butt end of the shaft typically received an iron butt cap — both to protect the shaft end from splitting and to provide a secondary striking surface in close-quarters combat.
Part Six — The Smith’s Place in Viking Society
More Than a Craftsman
The Viking spearsmith occupied a unique position in Norse society — simultaneously a skilled artisan, a semi-mystical figure, and an essential pillar of the warrior community.
Smithing was associated in Norse mythology with Völundr (Wayland the Smith) — the greatest craftsman in the mythological tradition, whose skill was so extraordinary it bordered on magical. Real smiths inherited some of this mystical association. The forge was a liminal space — fire, metal, transformation — and the smith who worked there was something between a craftsman and a sorcerer.
The Cost of a Spear
Viking Age weapons were not cheap by any standard. A quality spearhead represented hours of skilled labour, significant quantities of charcoal, and carefully selected iron. A pattern-welded prestige spear might represent days or weeks of a master smith’s time.
This cost shaped Viking warfare. Swords — requiring far more metal and even greater skill — were the weapons of the wealthy. Spears, cheaper to produce than swords but still quality weapons in skilled hands, were within reach of a broader warrior class. This is why the spear was so ubiquitous — it was the weapon that democratised Viking Age warfare.
Viking Spear Making Today — The Revival of a Lost Craft
The techniques of Viking spear making never entirely disappeared, but they came close. The Industrial Revolution made hand forging economically irrelevant for most purposes, and the knowledge of pattern welding in particular was largely lost in the West for several centuries.
The late 20th century saw a deliberate revival — driven by historical researchers, HEMA practitioners, and master blacksmiths determined to reconstruct the lost techniques from archaeological evidence and metallurgical analysis.
Today, a small number of specialist sword and spear makers worldwide produce pattern-welded Viking spear replicas using techniques as close to the originals as modern knowledge allows. These pieces — hand-forged, pattern-welded, socketed, heat-treated, and polished by hand — represent the pinnacle of the authentic viking spear replica market.
Our collection draws on this tradition. Every hand-forged Viking spear in our range is built to historically accurate specifications — not mass-produced, not cast, not finished by machine. Real steel, real craft, real history.
Conclusion — Fire, Steel & Centuries of Skill
The Viking spear was not born on a battlefield. It was born in a bog, refined in a bloomery, twisted in a forge, and finished by hands that understood metal the way a musician understands an instrument.
The history of Viking spear making is the history of human ingenuity — of craftsmen solving real problems with the materials available to them, producing weapons of extraordinary performance and beauty that modern metallurgists still study with admiration.
When you hold a hand-forged Viking spear replica today, you hold the product of that entire tradition — fifteen centuries of accumulated knowledge, compressed into steel and ash wood.


Add comment